Why Back Stretches?
Muscles of the back begin at the top of the buttocks (hips) and extend all the way up to the neck. The muscles of the back can also be categorized into three groups, superficial, intermediate and deep. The function of our back muscles varies with some being heavily involved in movement, some playing a big part in respiration and others playing a greater role in stability. Ultimately, if muscles in our back are ‘locked long’ or ‘locked short’ it can lead to poor posture, which can lead to poor overall movement. Let’s briefly look at how this can occur!
Why Are Tight Muscles An Issue?
In an ideal world, our muscles would be perfectly balanced and tensioned and we would always move with perfect alignment. From this position we are at our biomechanical best, moving efficiently and pain free. However, it is uncommon for us to move perfectly these days with a major factor being our modern lifestyle of being sedentary and sitting for long periods of time.
Let’s have a look at how a tight muscle can impact us. See below the quadratus lumborum muscle and notice its attachment points are at the top of the hips and the rib cage.
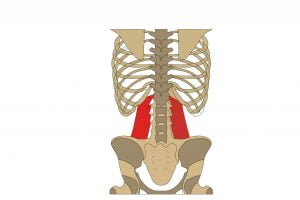
Image: Quadratus Lumborum Muscle
if this muscle is overly tight it can impact the positon of our pelvis. An excessively tight QL could pull the pelvis into an anterior tilt and hence away from that ideal neutral position. This can happen all over the body, where one muscles group is excessively tight and this leads to our body being pulled out of ideal alignment.
Stretching allows us to consciously elongate some of these muscles that are tight and this can lead to improved range of motion and improved posture over time. We hope the following stretches help you. In general we recommend holding these stretches for a minimum of 30 seconds and up to 1 minute. As always, if something doesn’t feel right, you should stop and seek advice from a health professional.
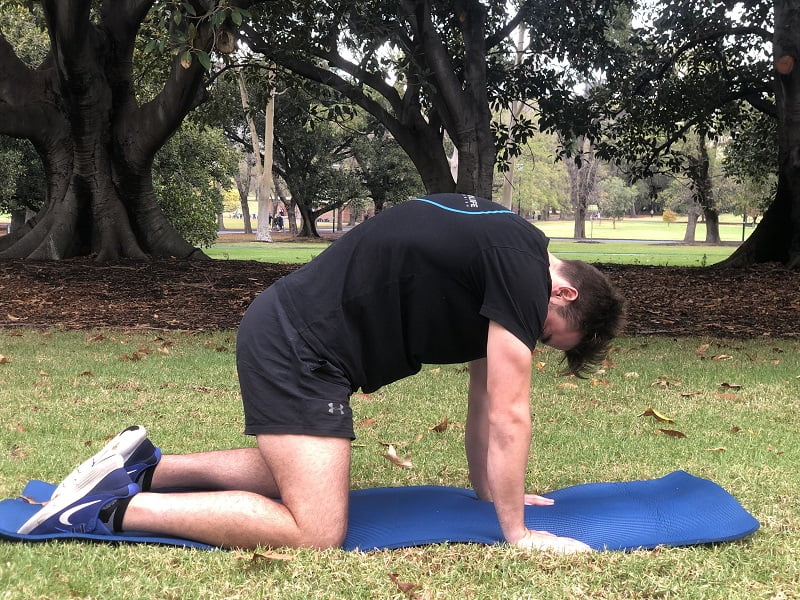
Cat + Cow Stretch
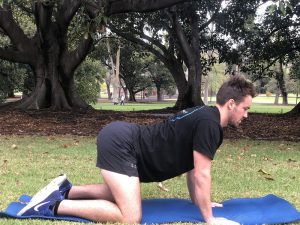
- Position yourself on your hands and knees (Keep arms and upper legs perfectly straight)
- Knees and feet hip distance apart. Arms shoulder distance apart (fingers spread evenly)
- Inhale -tilt your pelvis (hips) in order to arch your lower back and bring your head up (gaze up) putting the spine into extension.
- Hold for 10 seconds

- Same starting position as the Cow stretch
- Exhale and tuck your tailbone and round your back
- Head lowers and bring chin towards your chest.
- Draw navel (belly button) towards the spine
- Hold for 10 seconds
note: Switch between these two poses a total of 3 times each at 10 seconds per hold.
Child’s Pose Stretch
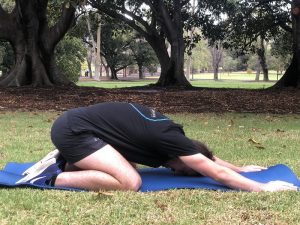
- Start in the same position as you would for the ‘Cat-Cow Stretch’ (however have your big toes touching)
- Widen your knees towards the outside of the mat, then move your backside towards your heels as you stretch your arms forward-and towards the floor.
- Aim to rest your chest between your thighs and your forehead, as close to the floor as you can
- Aim to keep your shoulders pulled down and back away from your ears.
- You should be trying to get your butt and chest as low as possible without being overly forceful.
You will improve on how low you can get with practice!
Child’s Pose + Rotation
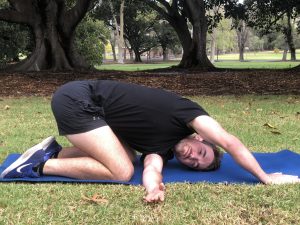

- Assume the same starting position as the Child’s Pose stretch (you will have your chest a little higher off the ground in this one)
- Slowly move one arm under your chest and rotate your torso
- Ensure this is a slow and smooth movement
- Find the appropriate level of stretch and hold for 30 seconds
Sitting With Knee Up + Rotation
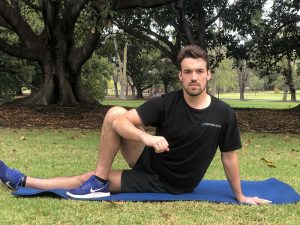
- Sit up tall with back in neutral position and legs straight out in front of you (you may need to slightly bend your knees in this position in order to keep a straight back)
- Cross your right leg over your left and bring leg up into a bent position
- Place your right elbow on the inside of your knee. Slowly pushing against the inside of your knee rotate the torso.
- Aim to keep the back as upright as possible whilst doing this.
- Hold for 30 seconds
- Repeat this movement on the opposing side.
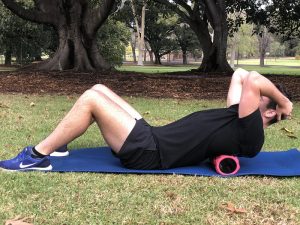
Thoracic Extension With Foam Roller
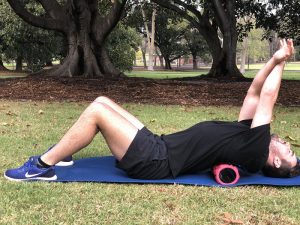
- Sit upright and arrange spine into a neutral position.
- Slowly lean back onto the roller, with the roller falling on your lower thoracic spine (top third of the back)
- Slowly lean back (allow gravity to pull you down, don’t push down against roller) over the roller, putting the thoracic spine into extension (the opposite direction to what we have it in on a daily basis if we sit down all day)
- Slowly move the roller up from the lower thoracic towards the upper thoracic. .
- If neck is feeling sore, put your hands behind your head to support your neck (as seen in photo
below)